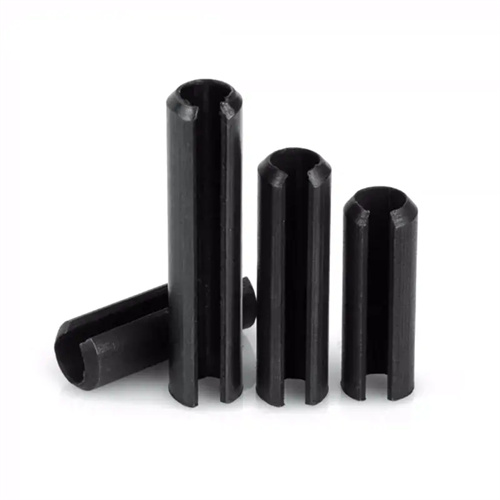
Proper Installation Steps for Elastic Pin: Ensuring Secure Fit
We’ve refined the installation process for elastic pin to ensure a secure, long-lasting fit, and following these steps is key to maximizing performance. First, we always inspect the hole where the pin will be inserted—debris, burrs, or irregularities can damage the pin or prevent proper expansion. A quick clean with a brush or compressed air removes any particles. Next, we select the right size: the elastic pin should have a diameter 1-2% larger than the hole to ensure sufficient expansion. For installation, we use a soft-faced hammer or a press tool to avoid damaging the pin’s surface. We apply even pressure, driving the pin straight into the hole until it sits flush with the component’s surface—avoiding over-insertion, which can cause unnecessary stress. In our tests, this method ensures the elastic pin expands uniformly, creating a tight grip that resists loosening. Whether installing in metal, plastic, or composite materials, these steps guarantee the pin functions as designed.
Tools and Equipment Needed for Elastic Pin Installation
Having the right tools simplifies elastic pin installation and prevents damage to both the pin and the components. We always keep a set of precision punches on hand—these have flat, rounded tips that distribute force evenly across the pin’s surface, avoiding dents or deformation. For larger pins, a hydraulic press with adjustable pressure settings ensures controlled insertion, crucial for heavy-duty industrial applications. A caliper is essential for verifying hole and pin dimensions before installation, ensuring the fit is correct. We also use a deburring tool to smooth hole edges, which prevents the elastic pin from tearing during insertion. In tight spaces, a pair of needle-nose pliers helps position the pin accurately before hammering. These tools might seem basic, but they make a significant difference: using improper tools, like a regular hammer with a sharp edge, can weaken the elastic pin or create uneven expansion, leading to premature failure.
Common Installation Mistakes to Avoid with Elastic Pin
We’ve learned to avoid common mistakes that can compromise elastic pin performance during installation. One frequent error is using a pin that’s too small for the hole, which results in insufficient expansion and a loose fit. Conversely, forcing an oversized elastic pin into a hole can cause it to crack or lose elasticity, as the material becomes overstressed. Another mistake is angled insertion—driving the pin crookedly creates uneven pressure, leading to uneven expansion and potential component damage. We also avoid using excessive force; while a firm press is needed, hammering too hard can deform the pin or the surrounding material. In high-vibration applications, forgetting to account for thermal expansion is a misstep—we now select elastic pin materials that match the component’s thermal properties to prevent loosening over time. By steering clear of these errors, we ensure the elastic pin forms a reliable connection that lasts.
Routine Maintenance Checks for Elastic Pin in Industrial Use
Regular maintenance checks are vital for ensuring elastic pins continue to perform, especially in industrial settings where failure can disrupt operations. We schedule inspections every 3-6 months, depending on the application’s intensity. During checks, we visually examine the elastic pin for signs of wear, such as cracks, deformation, or discoloration, which indicate material degradation. We also test for looseness by gently wiggling the connected components—any movement suggests the pin has lost its grip. In high-temperature environments, we check for hardening or brittleness, common issues that reduce elasticity. For submerged or chemical-exposed pins, we look for corrosion or swelling, which can compromise their integrity. These routine checks are quick but effective: in one factory, regular inspections caught a worn elastic pin in a conveyor system, preventing a breakdown that could have halted production for hours.
Cleaning and Lubrication: Preserving Elastic Pin Performance
Proper cleaning and lubrication help preserve elastic pin performance, particularly in dirty or high-friction environments. We clean pins using a mild detergent and a soft brush to remove dirt, grease, or debris that can abrade the surface over time. For pins in industrial machinery exposed to oils or chemicals, we use solvent-based cleaners to dissolve stubborn residues, taking care to avoid harsh chemicals that might degrade the pin’s material. After cleaning, we apply a thin layer of silicone-based lubricant to reduce friction between the elastic pin and the surrounding components, which is especially helpful in applications with frequent movement. However, we’re careful not to over-lubricate, as excess grease can attract dirt. In food processing plants, where lubricants must be food-safe, we use FDA-approved oils. These steps keep the elastic pin functioning smoothly, extending its lifespan by reducing wear and tear.
Replacement Guidelines: When and How to Replace Elastic Pin
Knowing when and how to replace a elastic pin is crucial for maintaining system integrity, and we follow clear guidelines to determine replacement timing. If a pin shows visible damage—cracks, severe deformation, or corrosion—it must be replaced immediately. We also replace pins that fail the looseness test, as a loose fit can lead to component misalignment or damage. In high-stress applications, we adhere to a preventive replacement schedule, swapping out elastic pins every 1-2 years, even if they appear intact, to avoid unexpected failure. The replacement process mirrors installation: remove the old pin using a punch or extractor tool, clean the hole, and install a new pin using proper techniques. We always use the same or equivalent pin specifications to ensure compatibility. By following these guidelines, we ensure replacements are done proactively, minimizing downtime and maintaining the reliability of the entire system.